


Contouring a mature face isn't about trying to look 20 again; it's about gently restoring dimension and creating a subtle, elegant lift. We're not drawing harsh, dramatic lines here. Instead, the focus is on using beautiful, creamy products and placing them just a touch higher than you might be used to. This simple shift works with your skin's natural evolution, enhancing your features in the most graceful way.
Why Contouring for Mature Skin is Different
Let's get real for a moment. The old-school, Instagram-style contouring rules just don't apply to mature skin. Those heavy powders and sharp, chiseled stripes we’ve all seen? They have a nasty habit of settling into fine lines, which can make you look harsh and, frankly, older.
The modern approach is all about creating a soft, natural-looking lift using the beautiful interplay of light and shadow. The goal isn't to change your face or erase your age, but to enhance your best features with techniques that are sophisticated and, most importantly, achievable.
This strategic shift is so important because our facial structure naturally changes over time. We tend to lose a bit of volume in certain areas, which can lead to skin feeling less firm. It’s a huge market for a reason—the global facial rejuvenation market was valued at USD 21.82 billion and continues to grow. You can see more data on this trend over at Straits Research. Luckily, makeup is an incredible and non-invasive way to work with these changes.
Embracing a Modern Approach
The new way of thinking is about working with your skin's gorgeous texture, never against it. That means putting hydration first and reaching for products that melt into the skin and blend out like a dream. Think of it less like carving out your features and more like gently guiding them upward for a beautifully refreshed look.
To give you a clearer picture, let's compare the old way with the new.
The Modern Shift in Contouring Mature Skin
This table breaks down the key differences between dated contouring methods and the modern techniques that are truly effective for mature skin. It's a quick visual guide to help you make the right choices.
| Technique Element | Outdated Contouring (20s/30s) | Modern Mature Contouring (40+) |
|---|---|---|
| Product Choice | Heavy powders, thick concealers | Lightweight creams, liquid formulas |
| Placement | Low in the hollows of cheeks | Slightly higher, on top of cheekbones |
| Color Tone | Often warm, bronzer-like shades | Cool-toned, shadow-mimicking shades |
| Application | Sharp, defined lines | Soft, diffused application |
| Blending | Harsh edges, heavily blended | Seamless, blended until undetectable |
| Goal | Dramatically reshape the face | Gently lift and restore dimension |
Seeing them side-by-side really highlights how the philosophy has changed. We're moving away from masking and toward enhancing.
The secret is to add dimension back where it’s been naturally lost. A soft contour can redefine a softer jawline and lift the cheekbones, giving the illusion of fullness and structure without ever looking heavy or obvious.
This approach is incredibly empowering. It's about moving past trends that were never designed for us and instead celebrating the beauty you have right now. By using high-quality products easily found at Canadian retailers and focusing on techniques that feel authentic, you can create a polished, radiant look that is all your own.
For even more tips designed for this chapter of life, take a look at our comprehensive guide on how to apply makeup after 50. It will help you master a technique that feels both beautiful and completely true to you.
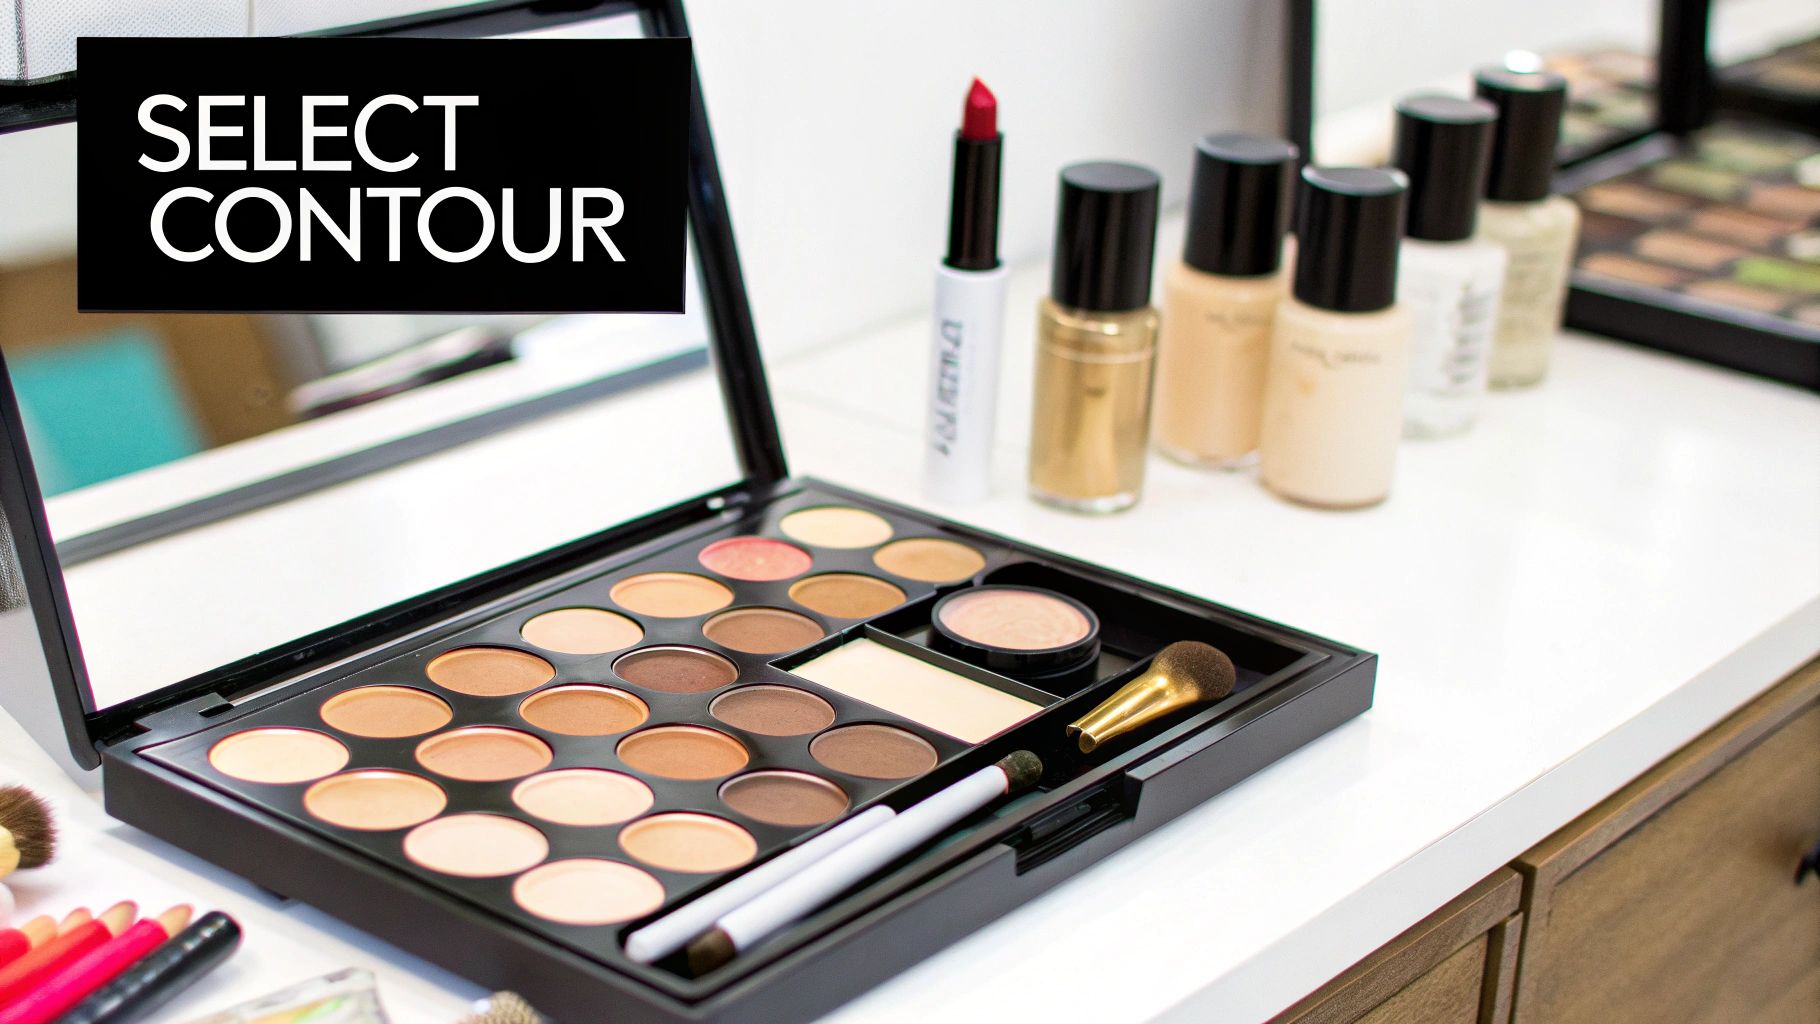
Choosing Your Contour Toolkit
The real secret to a beautiful contour on mature skin isn't some complicated technique—it's all in the products you choose. It's time to set aside everything you've learned about heavy, matte powders. On skin that’s lived a little, they can be your worst enemy, settling into fine lines and creating a dry, almost chalky finish.
Instead, your new go-to products should be hydrating, creamy formulas. Think things that blend like a dream and leave behind a subtle, healthy glow. We're moving away from makeup that just adds color and into a world where it also brings skincare benefits to the table.
Embrace Cream and Liquid Formulas
When you're working with mature skin, the texture of your contour is everything. Heavy powders just sit on the surface, which can spotlight any texture you're trying to soften. Cream and liquid products, on the other hand, practically melt into your skin, giving you a much more natural, second-skin finish.
Here’s why they’re so much better for this job:
- Seamless Blending: They are incredibly forgiving and so much easier to diffuse, which means no harsh, obvious lines.
- Hydrating Properties: Many are packed with ingredients that moisturize the skin, keeping it from looking dry or crepey under your makeup.
- Radiant Finish: They usually leave a soft, satin finish that looks just like healthy, luminous skin.
Next time you’re browsing at Sephora Canada or Shoppers Drug Mart, keep an eye out for contour wands, cream sticks, or even serum-infused concealers that are just a couple of shades deeper than your skin tone. These are the tools that will give you the control and blendability you need.
A common mistake I see is people using a shimmery bronzer to contour. Remember, a contour is meant to mimic a natural shadow, and shadows are never shimmery. Save the sparkle for your highlighter, which is designed to catch the light.
This isn't just a niche preference, either. The global contouring market is valued at $8.5 billion, and a huge part of that growth comes from mature consumers. In Canada, women over 50 are a significant and discerning demographic, actively looking for gentle yet effective products made for their skin.
Look for Skin-Loving Ingredients
The right ingredients can completely change how makeup sits and performs on mature skin. You'll want to find formulas that are loaded with hydrating and plumping agents.
A hero ingredient to look for is hyaluronic acid. It’s a moisture magnet, helping to temporarily plump up fine lines and create a much smoother canvas for your makeup. Other wonderful additions are things like jojoba oil or shea butter, which add a bit of nourishment and help the product glide on smoothly without any tugging.
Of course, choosing the right contour products is just one piece of the puzzle. It all starts with the right base. For a deep dive into creating that perfect canvas, you should check out our guide on finding the best foundation for mature skin. When your whole toolkit works together—from your skincare to your final touch of color—you create a lifted, defined look that feels completely, and beautifully, you.
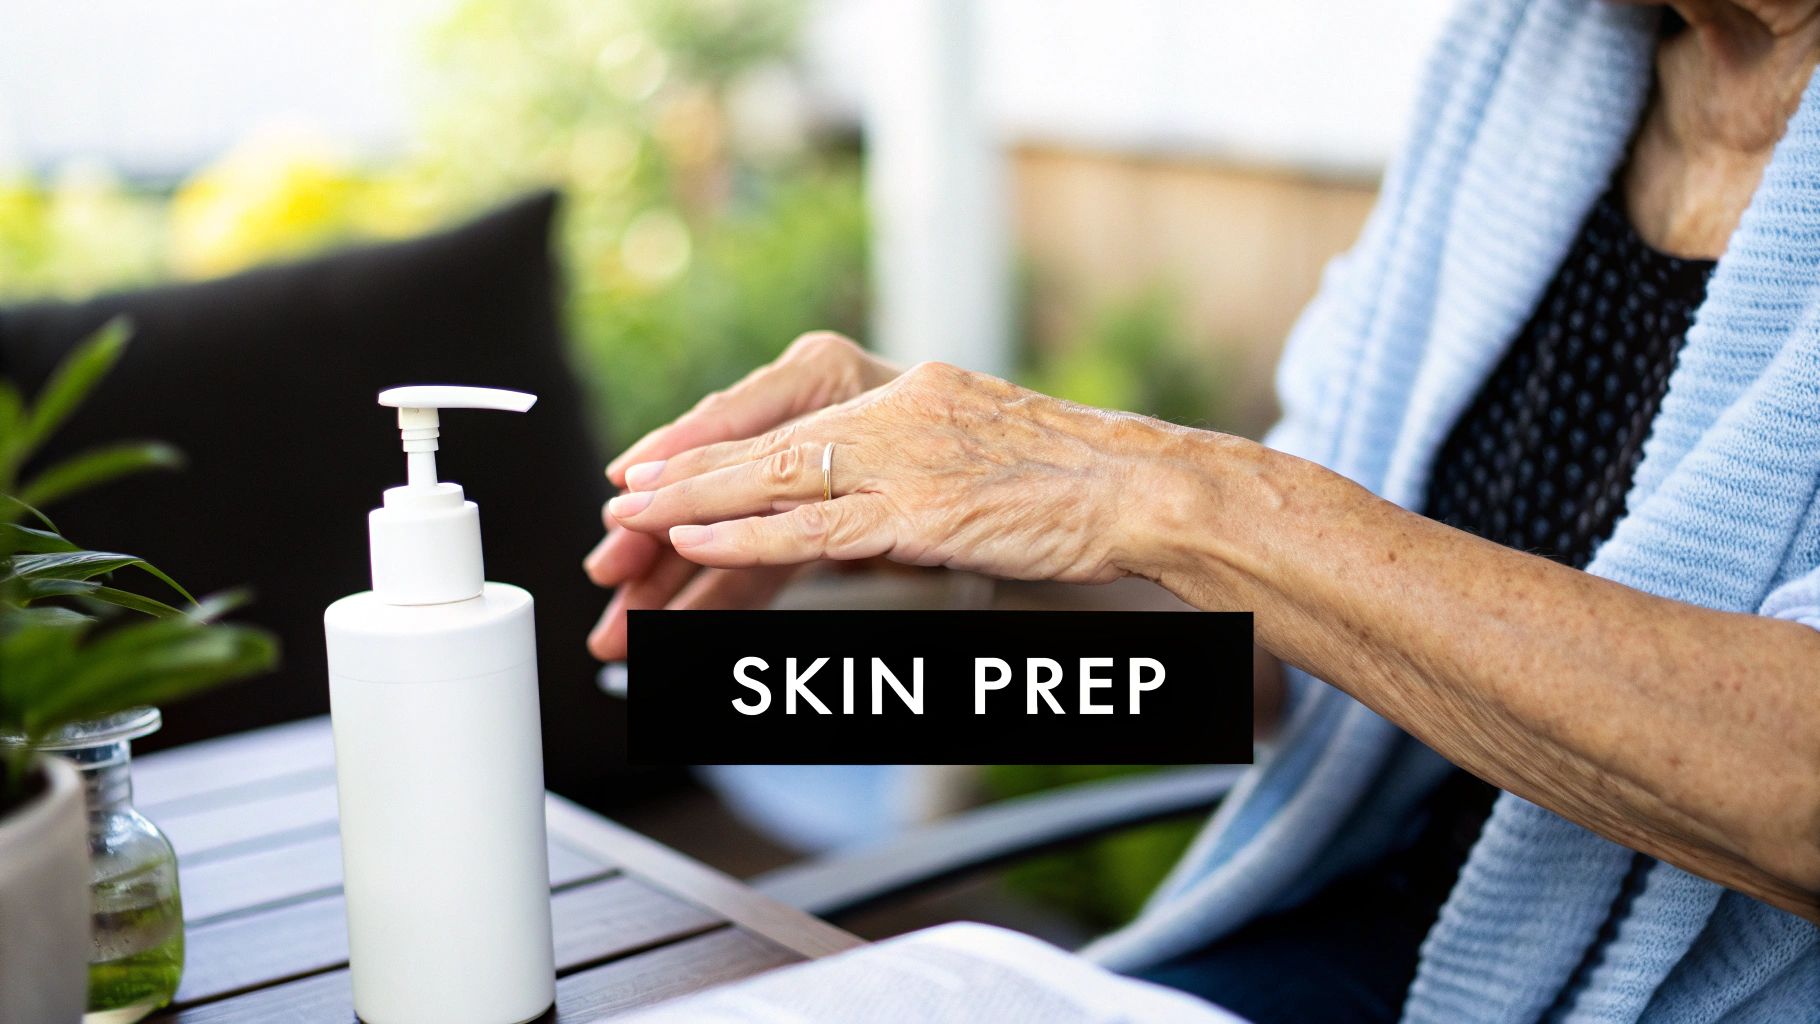
The Secret to a Flawless Application
I’ve learned over the years that a gorgeous contour has very little to do with the makeup itself, at least at first. The real magic happens before your brush even picks up any product.
Think of it like this: you can't create a masterpiece on a canvas that's rough and dry. The same is true for our skin. For those of us with mature skin, especially facing Canada's changing seasons, this prep work isn't just a nice extra step—it's everything. It’s what makes the difference between a smooth, professional finish and a look that just doesn't sit right.
The mission is to create a hydrated, plump, and even base for your makeup. When you get this right, your contour products glide on like silk instead of catching on dry patches or settling into fine lines. This is how you achieve makeup that looks like a second skin, not a mask.
Your Hydration-First Routine
Trust me, spending a few extra minutes on skincare will completely elevate your makeup game. It doesn't have to be some complicated, 10-step ordeal. It’s all about a smart, targeted approach that focuses on deep hydration.
I always rely on three key products to get the job done:
- A Hydrating Serum: Kick things off with a serum packed with something like hyaluronic acid. It’s like giving your skin a huge drink of water, plumping it from the inside out and smoothing the surface beautifully.
- A Nourishing Moisturizer: Next, lock all that goodness in with a quality moisturizer. This is so important for softening skin texture and creating a smooth barrier that helps your makeup apply evenly.
- A Blurring Primer: This is your final touch. A great primer will softly blur the look of fine lines and pores. I often recommend silicone-free formulas because they feel weightless and won’t pill up under your contour.
This simple trio transforms your skin into the perfect canvas. When your skin is properly hydrated, contour creams melt in beautifully, giving you that coveted radiant finish instead of a dry, cakey look.
Taking the time to prep your skin this way doesn't just improve how your contour looks in the moment; it seriously extends how long it lasts. If you want to dive deeper into longevity, our guide on how to make makeup stay on all day has some fantastic tips that build on this routine.
Ultimately, dedicating these few moments to skin prep is the foundational secret to truly mastering how to contour a mature face.
A Practical Guide to Lifting and Defining
Alright, let's get to the good stuff—the actual application. This is where the magic happens, and you’ll see firsthand how a few smart, intentional placements can give your face a soft, beautiful lift. Forget everything you might have learned about harsh, chiseled contouring; for mature skin, our goal is to gently guide the features upward.
It’s all about creating the illusion of shadow in very specific places. We're not just showing you where to put the product; we're explaining the why behind each touch. Think of this less like a rigid tutorial and more like a chat with a Canadian makeup artist who truly understands mature skin.
Sculpting Cheekbones Upward
Here’s the single most common mistake I see: placing contour too low on the face. When we follow the classic technique of sweeping it into the hollows of the cheeks, it can unintentionally drag everything down. We want the opposite of that.
Instead, take your finger and feel for the very top of your cheekbone. You're going to apply your contour just underneath that high point. Then, and this is crucial, blend it upward and outward toward your temples. Imagine you’re gently cupping the cheekbone from below to give it a boost, not carving out a hollow beneath it.
This simple shift in placement creates an immediate visual lift, making your cheeks appear fuller and more prominent. It’s a subtle change, but the impact is huge.
The most important thing to remember is to always blend up and out. Never, ever drag the product down. This simple motion reinforces that lifted effect and prevents any harsh, downward-facing lines that can inadvertently age the face.
This philosophy of soft enhancement is echoed in professional aesthetic treatments. As detailed in a market analysis of body contouring treatments on MarketsandMarkets.com, the modern focus is always on achieving a refreshed, revitalized appearance, not a dramatically altered one.
Defining the Jawline
A soft, defined jawline can be one of the most elegant features. As we get older, it can lose a bit of its natural sharpness, but a little contour can bring it right back without looking obvious.
The trick is to avoid drawing a hard line directly on the jawbone. Apply your cream contour just underneath it. I find it works best to focus the product on the area from below your earlobe to about the center of your chin.
Then, gently blend it downward onto your neck. This creates a subtle shadow that makes your jawline appear more defined and taut when viewed from the front. The key is to make sure it's completely seamless—no visible lines allowed!
This simple visual breaks down the ideal contour shade depth for a believable look.
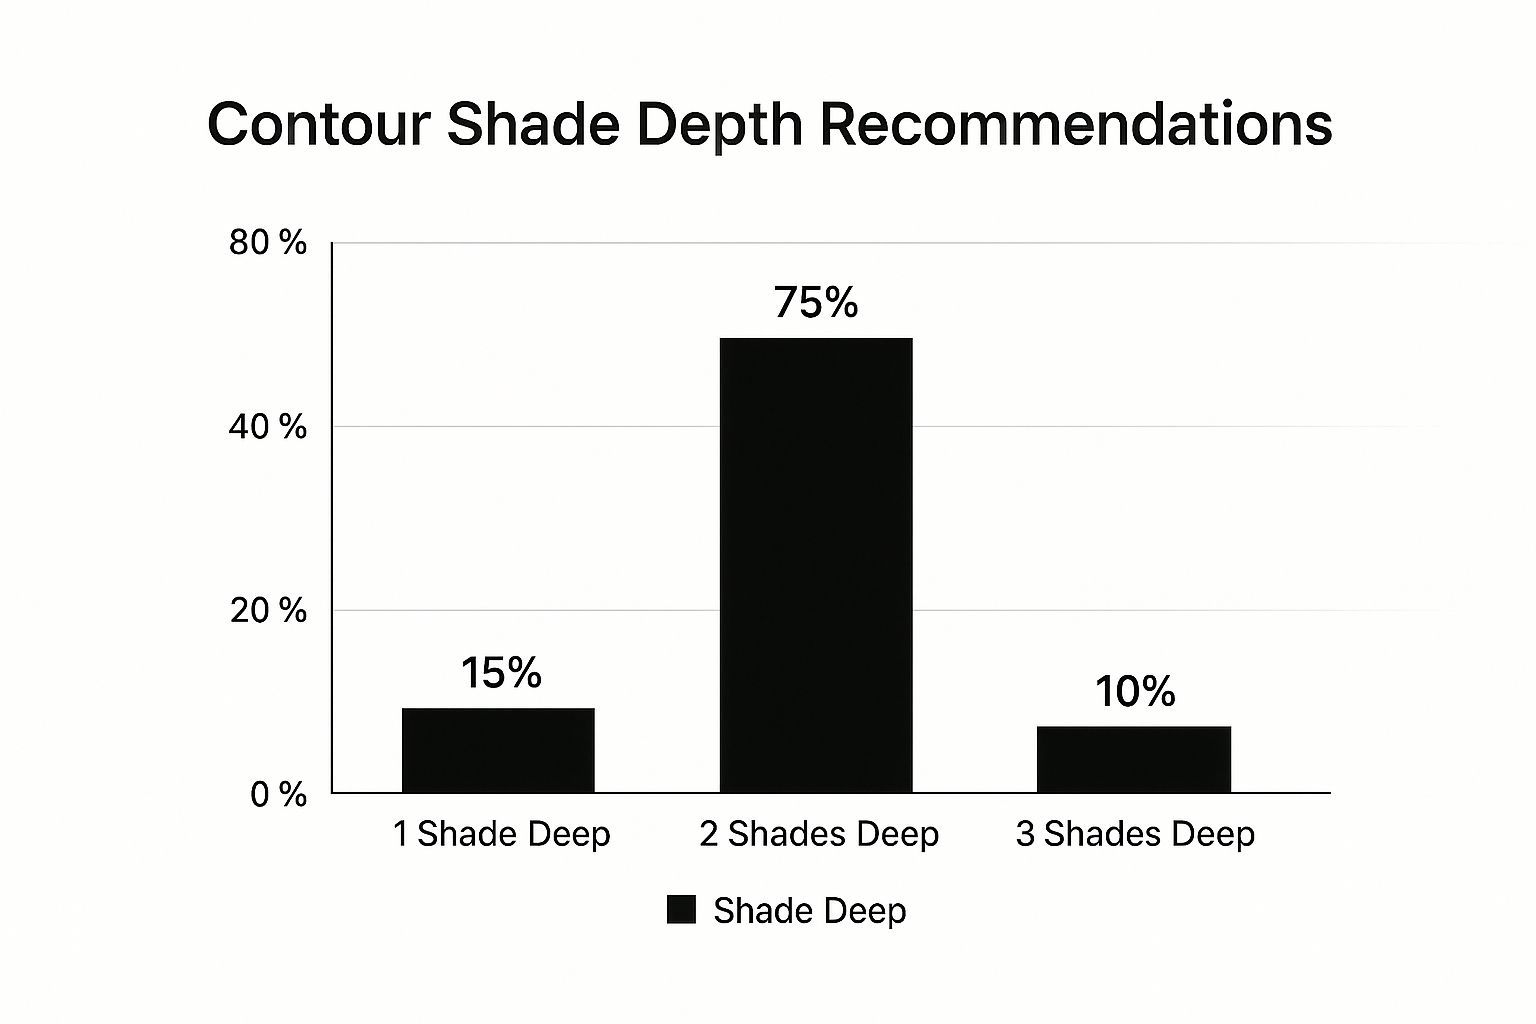
As you can see, choosing a shade that's just two levels deeper than your skin tone is the sweet spot. It gives you enough definition to make a difference without looking heavy or unnatural.
Softening the Forehead and Temples
Don't forget the top of your face! A light touch of contour along the hairline adds warmth and dimension, which helps create a beautiful, balanced look. This is especially helpful if you feel your forehead is a bit prominent or if you simply want to create the illusion of a more oval face shape.
Just apply a small amount of product to your temples and sweep it along the hairline. The key is to blend it back into your hair so it disappears. Use a very light hand here—you’re aiming for a soft halo of color, not a distinct stripe.
Brightening with Concealer
Contouring creates shadows, but its secret weapon is highlighting. This is where we strategically bring light back to the face to complete the lifting effect. For mature skin, I always recommend using a concealer that's one shade lighter than your foundation. Stick to a satin or natural finish; anything with shimmer or glitter can settle into and emphasize fine lines.
For maximum impact, focus your concealer on these key areas:
- Inner Corner of the Eye: A tiny dot here makes you look instantly more awake and bright.
- Outer Corner of the Eye: This is my favorite trick. Place a small dash diagonally, sweeping it upward toward the temple. It’s like an instant, non-surgical eye lift.
- Marionette Lines: A tiny amount blended right into the lines that run from the nose to the corners of the mouth can beautifully soften their appearance.
To help you get this step just right, let’s map it all out.
Placement Guide for a Youthful Lift
This table is your cheat sheet for where to apply each product to achieve that lifted, sculpted look we're after.
| Facial Area | Contour Placement Tip | Highlight Placement Tip | Blush Placement Tip |
|---|---|---|---|
| Cheeks | Just beneath the highest point of the cheekbone, blending up and out. | On the very top of the cheekbones, just above the contour. | On the apples of the cheeks, blending back toward the highlight. |
| Eyes | (Not recommended for lift) | A dot on the inner corner and a swipe up from the outer corner. | (Not applicable) |
| Jawline | Just under the jawbone, blending down toward the neck. | A light touch on the center of the chin to bring it forward. | (Not applicable) |
| Forehead | Along the hairline and at the temples, blending back into the hair. | A small amount in the center of the forehead, between the brows. | (Not applicable) |
Remember, this is a guide, not a set of rigid rules. The goal is to enhance your unique features with a light, confident touch.
Choosing the right concealer is just as important as where you place it. For a full breakdown of formulas that won't crease or settle, you'll want to read our guide on the best concealer for mature skin. By combining these strategic placements with a light hand and the right products, you'll master the art of contouring for a defined, elegant, and beautifully lifted look.
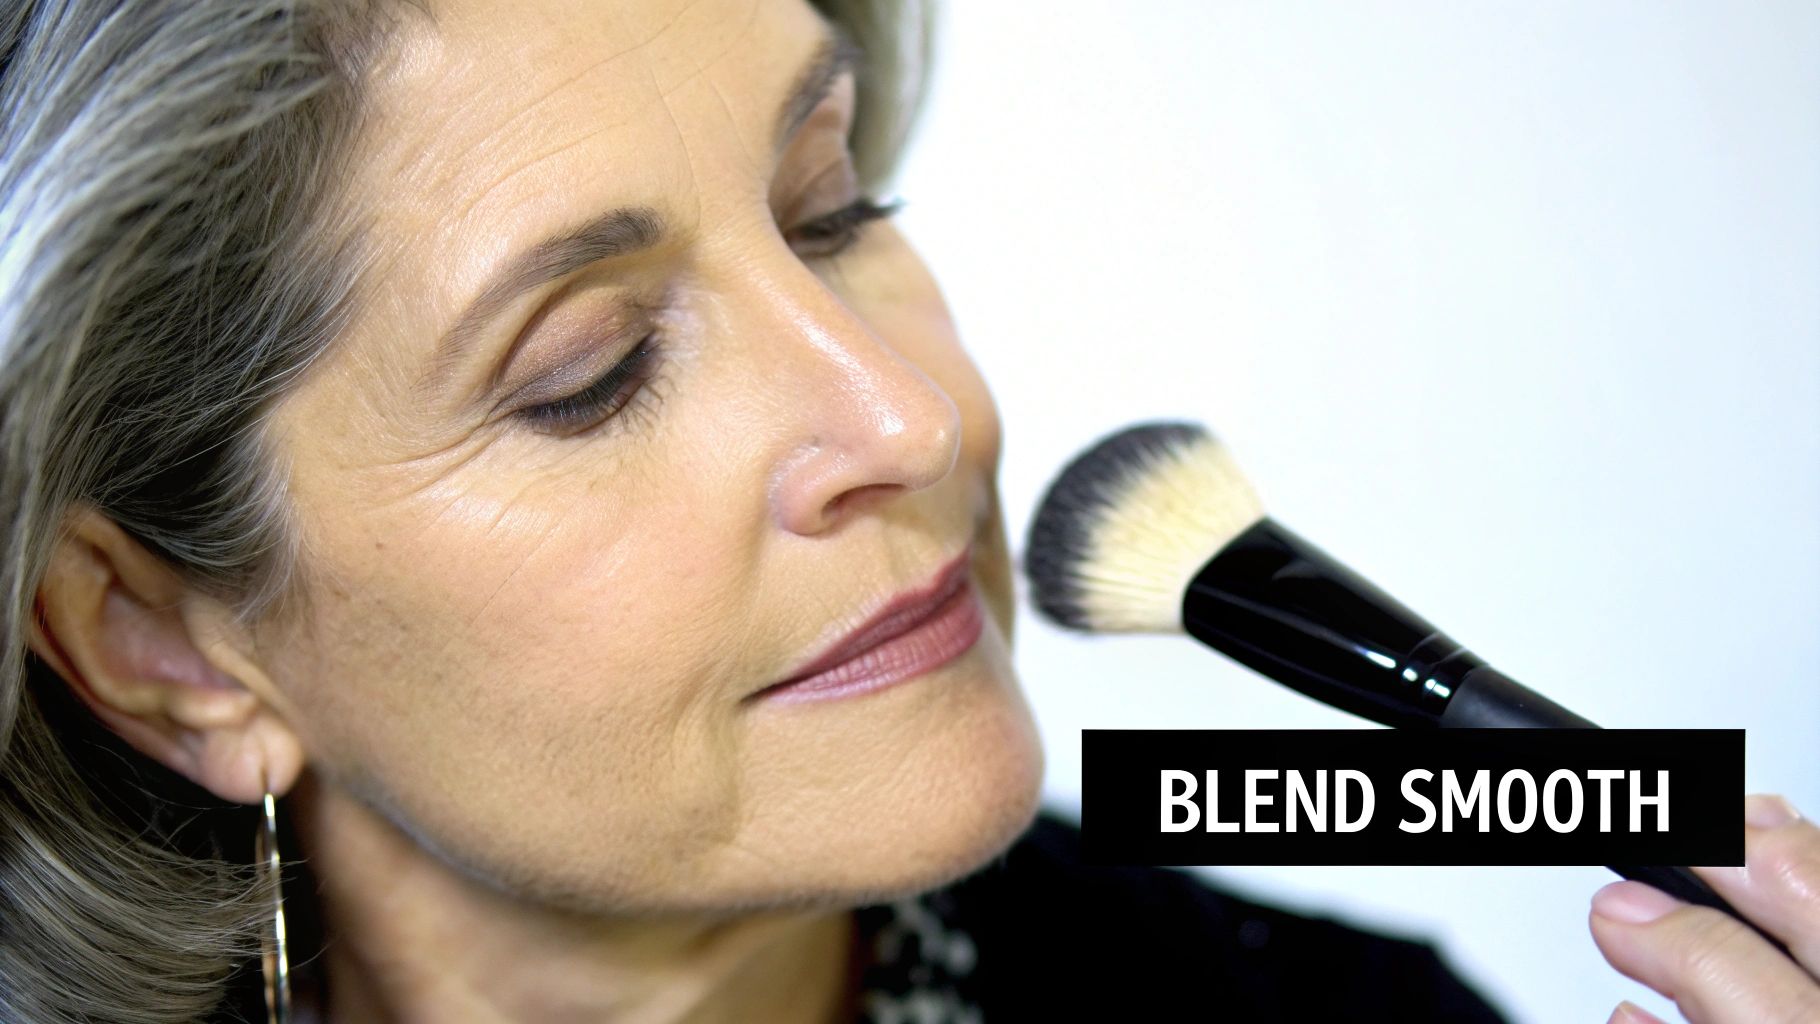
Mastering the Art of the Blend
Applying your contour is just the beginning. The real magic happens when you blend. This is what separates harsh, obvious lines from soft, believable shadows that truly sculpt your features. The goal is to create a seamless finish where you can’t tell where your skin ends and the makeup begins. It should look like your bone structure, just enhanced.
The right tools are everything here. While fingers can work in a pinch for warming up product, a dedicated tool gives you far more control for a polished look. A damp beauty sponge is my go-to for melting cream products into the skin, giving you that beautiful, sheer effect. If you prefer a brush, grab something dense but soft—an angled kabuki is perfect for gently buffing the product without disturbing the foundation you’ve already applied.
The Press and Roll Technique
If you learn just one new trick today, make it this one: the press and roll method. This technique is a lifesaver for mature skin. Traditional swiping or aggressive buffing can tug at delicate skin and move your base makeup around, creating a muddy mess. This method is so much gentler.
Take your damp sponge or dense brush and lightly press it onto the contoured line. Then, without lifting, just roll it slightly in place. Think of it as a soft stippling motion with a gentle pivot. This tiny movement melts the product directly into your skin instead of dragging it across the surface. It diffuses those harsh edges beautifully and keeps your foundation right where it belongs.
The secret to a natural blend is patience. Work in light layers and use gentle pressing motions. This ensures the product becomes one with your skin, creating a truly undetectable shadow that lifts and defines.
Setting Your Cream Contour
Now, let's make sure that gorgeous contour stays put. This is a critical step, and it’s where a lot of people accidentally sabotage their work. Reaching for a heavy, matte powder is the fastest way to undo that youthful glow, making skin look dry and emphasizing any texture.
We have to be more strategic. Choose a finely milled, translucent powder—the lighter, the better. Using a small, fluffy brush, apply it only where you contoured with that same gentle pressing motion.
After a light dusting of powder, a hydrating setting spray is your absolute best friend. I love formulas with ingredients like glycerin or hyaluronic acid because they lock your makeup in place while adding a last touch of dewy, healthy-looking radiance. This duo ensures your makeup lasts all day without sacrificing that beautiful, luminous finish.
For more advice on creating a full, polished look, be sure to check out our detailed makeup tutorial for older women, which is packed with tips that build on these blending techniques.
Common Contour Mistakes and How to Fix Them
Learning to contour on mature skin is a bit of an art, and trust me, everyone has a few "oops" moments when they start. But don't get discouraged! Think of it less as a mistake and more as part of the learning curve. The most common slip-ups are surprisingly simple to spot and even easier to correct. This is makeup, after all—it's all about practice, not perfection.
The number one thing I see is people reaching for a contour product with shimmer. I get it, we love a good glow! But contouring is all about creating the illusion of a shadow, and shadows in real life are never sparkly. A shimmery contour will catch the light, doing the exact opposite of what you want and often highlighting skin texture you'd rather soften.
The fix? It's simple. Always, always opt for matte, cream-based formulas. They melt into the skin and create believable, natural-looking definition.
Another classic trap is placing the contour too low on the cheek. When you follow the deep hollows under your cheekbones, it can actually pull your features down, which is the last thing we want. A tiny placement adjustment can completely change this.
Correcting Common Application Errors
Have you ever ended up with a harsh, muddy-looking line that just won't blend? It happens to the best of us, but it doesn't have to ruin your look. With the right tools, you can fix just about any contouring snafu in a matter of seconds.
-
The Problem: Your contour looks too dark or harsh. This is usually just a case of being a little too heavy-handed right from the start. My mantra is: it’s always easier to add more product than it is to take it away.
-
The Quick Fix: Grab a clean, damp beauty sponge and add just a dot of your foundation or concealer. Gently press and tap it right over the edges of the contour. This little trick instantly diffuses the color, melting it right into your base for a seamless finish.
-
The Problem: You've placed the contour too low. You were aiming for sculpted, but instead, you've accidentally dragged your cheekbones down.
-
The Quick Fix: Don't even think about wiping it off! Instead, take a small brush with a bit of your foundation or a lighter concealer and apply it directly underneath that misplaced contour line. As you blend this upward, it cleans up the bottom edge and creates a sharp, lifted effect. It’s like magic.
Think of your foundation-tipped sponge as a magic eraser for makeup. It’s my go-to trick for softening any line that looks too strong or sharp. It truly is the secret to getting a flawless, beautifully blended look every single time.
Once you know what to watch out for, you can start troubleshooting on the fly and build real confidence. Every time you pick up that contour stick, you're getting one step closer to mastering a technique that truly enhances your beautiful features.
Your Contouring Questions Answered
Even with all the steps laid out, a few practical questions always come up. It's completely normal! Let's get into the most common ones I hear from women across Canada. My goal is to give you clear, quick answers that will help you feel more confident as you practice.
A big one I get asked all the time is, "Can I just use my bronzer to contour?" I know how tempting it is to make one product do two jobs, but for this, it’s best to use separate products.
Bronzers are almost always warm-toned and usually have a bit of shimmer. They’re designed to add warmth where the sun would naturally give you a tan. A contour, on the other hand, needs to be a cool-toned, matte shade to create a convincing shadow. That's what gives you the sculpted effect.
Then there's the question of timing. "Do I apply contour before or after foundation?" For the cream products we've been talking about, the magic happens after your foundation but before you apply any setting powder. This order is key because it lets the creamy contour melt right into your foundation, giving you that beautiful, seamless finish that looks like real skin.
A Few Final Tips
Before you go, let me leave you with a couple of last-minute thoughts to keep in your back pocket.
-
How often should I clean my brushes? When you're working with cream products, it's a good idea to clean your brushes or sponges at least once a week. This stops product from building up (which makes blending a nightmare) and keeps bacteria away.
-
What if I don't wear foundation? You can absolutely still contour! Just apply your cream contour directly onto moisturized and primed skin. Blend it out really well, and you'll get a lovely, subtle sculpt that looks completely natural.
Ready to create that beautifully lifted look with products made just for you? The entire PriPedi skincare and makeup collection is designed to nourish and celebrate mature skin. Discover your new favourites today at PriPedi.com.